By now, most are familiar with online generative AI tools like ChatGPT, Gemini, and Claude. They offer users the ability to brainstorm ideas, revise papers, generate code, and more with just a few keystrokes. But did you know that you can have those same capabilities by running generative AI locally on your computer, even without internet? In this blog post, we’ll highlight common reasons generative AI locally might be the right choice for you and how to run models on your computer locally in a step-by-step guide on installing and using GPT4ALL.
What does it mean to “run generative AI locally”?
When I say “running generative AI locally”, I am referring to the practice of using generative AI models that I have downloaded directly on personal devices such as smartphones or laptops, rather than relying on distant cloud servers, as is the case for online tools like ChatGPT.
Why run generative AI locally?
- Data and privacy: Centralized services like ChatGPT store your data in their servers, which can include everything from your chat history to device information, and they are allowed to use this data to train future models if you don’t opt out. Further, you do not have control over who sees your data, how it is stored, or how they manage it beyond the options they provide you. This poses major privacy concerns, especially in the post-secondary or proprietary context. When running generative AI locally, all your data is stored locally on your computer and this minimizes the risk of your data being used, stolen, or sold without your consent.
- Environmental concerns: Even when these services are online, they still need hardware to be stored and run. In the case of generative AI, this hardware is usually stored in data centers. Data centers require resources, such as the raw materials to create the hardware, the water to cool these large systems, and contribute significantly to global energy consumption (which largely requires the burning of fossil fuels). As a result, many are concerned about the environmental impacts of AI tools as more people use them as casually as Google. By running your AI tools locally, you are lowering the environmental impact of using AI as you are not contributing to the use of data centers and your device limits your energy consumption.
- Offline access: Are you in a remote area with spotty internet or dealing with power outages? Then no problem! By using local AI tools, you can use generative AI without the need for internet, which ensures uninterrupted access.
- Consistency of output: Cloud-based models are frequently updated, which can disrupt workflows and research that relies on reproducibility. Local setups provide stability by allowing you to use the same model version every time and choose when you download the updated model.
In my exploration of this topic, I have used four different applications to run generative AI locally on my computer: Ollama, Jan, GPT4ALL, and LM Studio. But for this blog post, I have chosen to feature GPT4ALL from Nomic AI for the following reasons:
- Is an open-source software,
- Emphasizes privacy,
- Can interact with your local documents,
- Quick to install (10-15 minutes),
- Easy to use and is virtually “plug-and-play”,
- Easy to customize the System Message of the model, which tells the model how to behave and interpret the conversation.
Get Started with GPT4ALL
The following is a step-by-step guide on downloading, installing, and using GPT4ALL. Disclaimer that I am a Mac user, so this guide shows the process using MacOS.
- If you’d prefer a video tutorial, Nomic AI has already published one: Running private, on-device AI chat anywhere | GPT4All Official Tutorial [YouTube Video].
- Nomic AI also has a QuickStart guide on their documentation website: GPT4All Desktop – QuickStart.
If you’d like to skip over the installation steps, go to the section Use GPT4ALL.
Download and install GPT4ALL
1. Download GPT4ALL
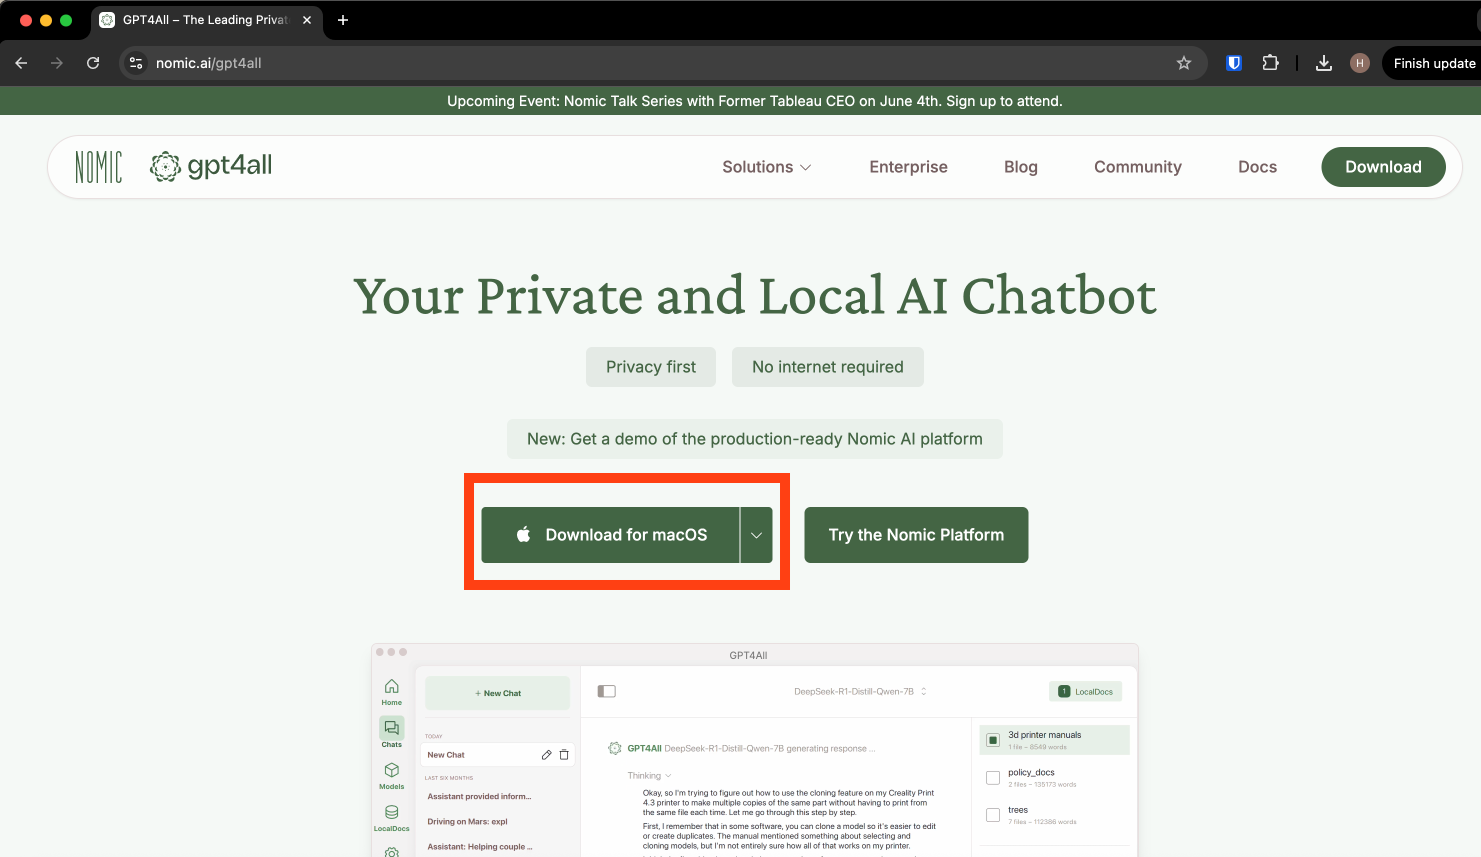
First, go to https://www.nomic.ai/gpt4all to download GPT4ALL. You do this by selecting the correct operating system for your device (macOS, Windows, Windows ARM, or Ubuntu) from the dropdown menu, and clicking the “Download” button.
2. Open installer
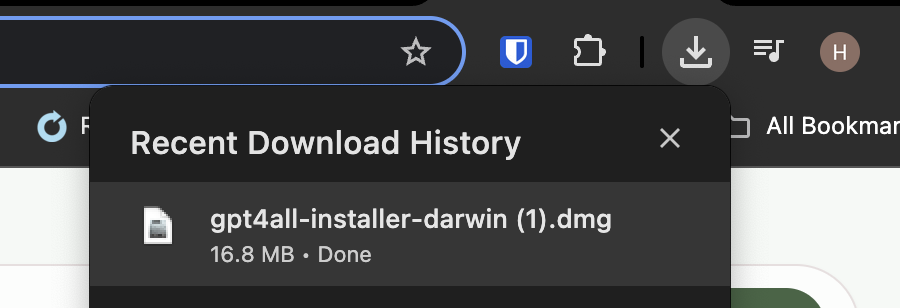
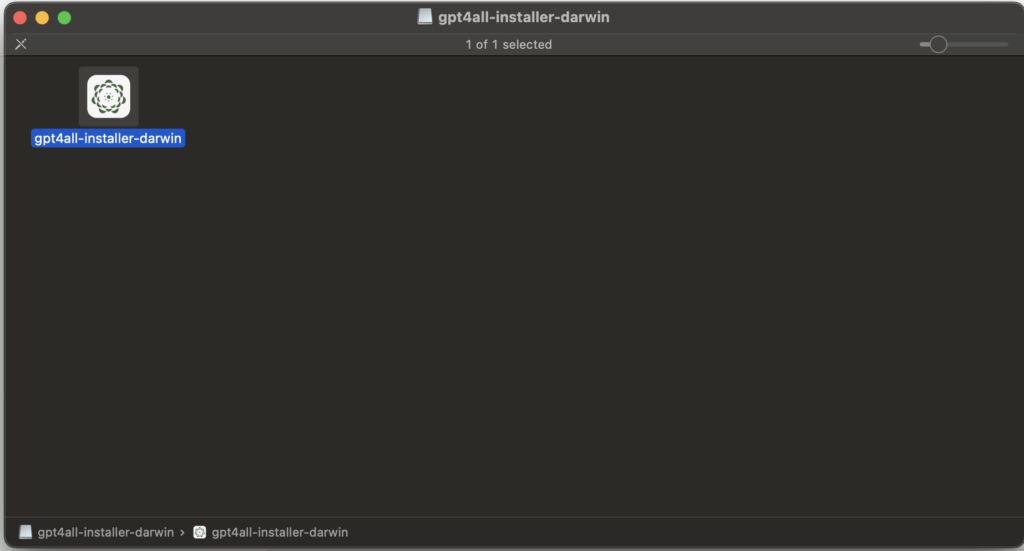
Once downloaded, go to your “Downloads” folder and open the DMG file. Then click to open the GPT4ALL installer.
3. Navigate GPT4ALL installer
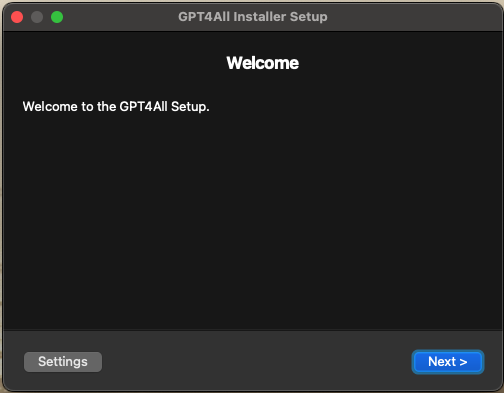
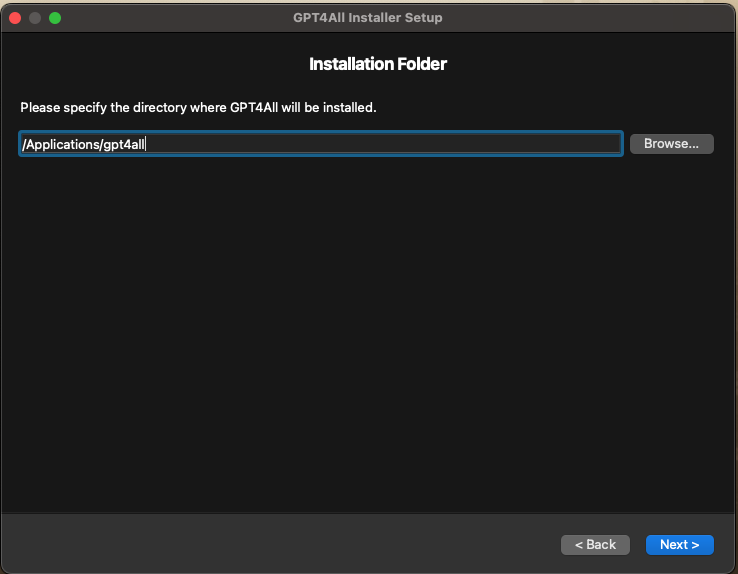
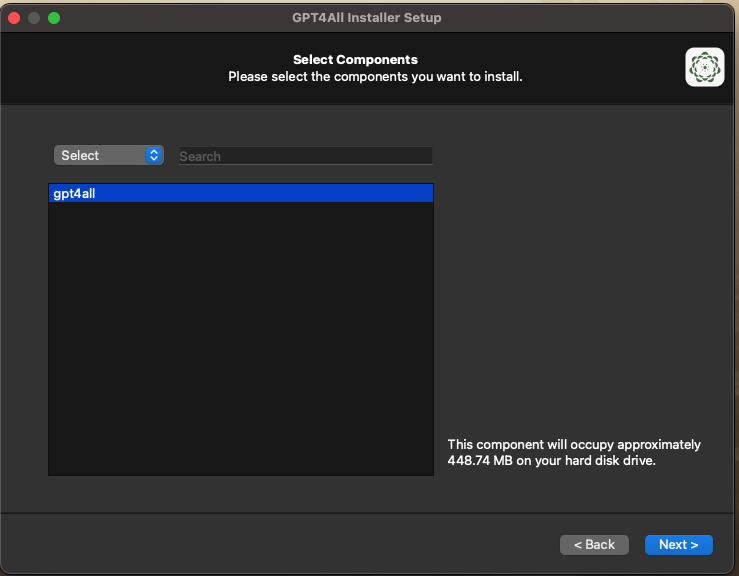
Once opened, the GPT4ALL Installer Setup window will then pop up. You will have to navigate through several standard windows such as choosing an installation folder (Applications is default), selecting components to install, and accepting the license by clicking “Next”.
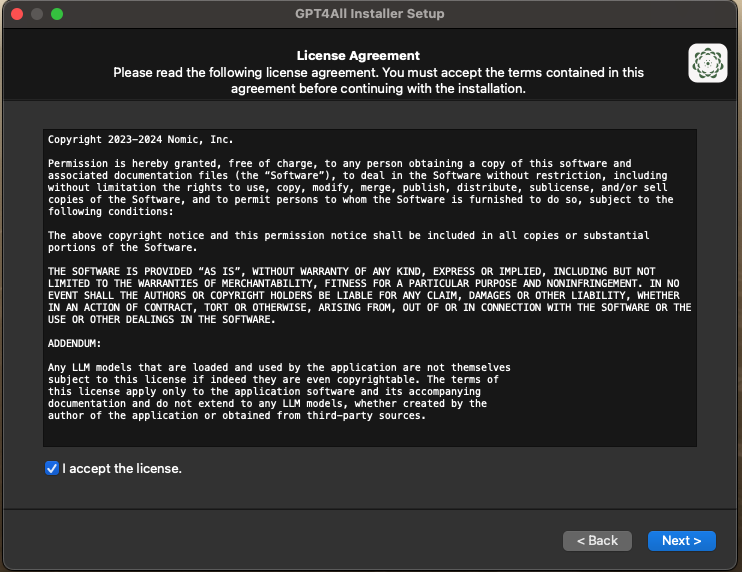
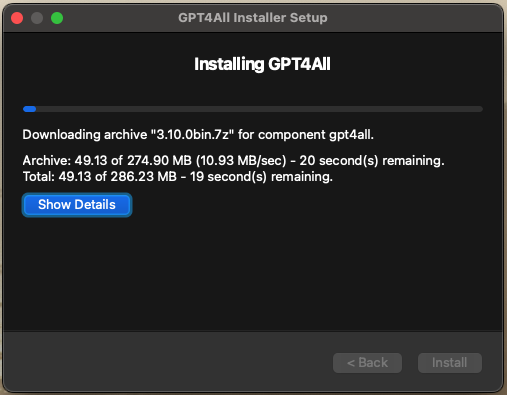
Once you’ve accepted the license, and clicked “Next”, the installation will begin. Once everything has finished downloading, click “Install”.
Use GPT4ALL
1. Open GPT4ALL
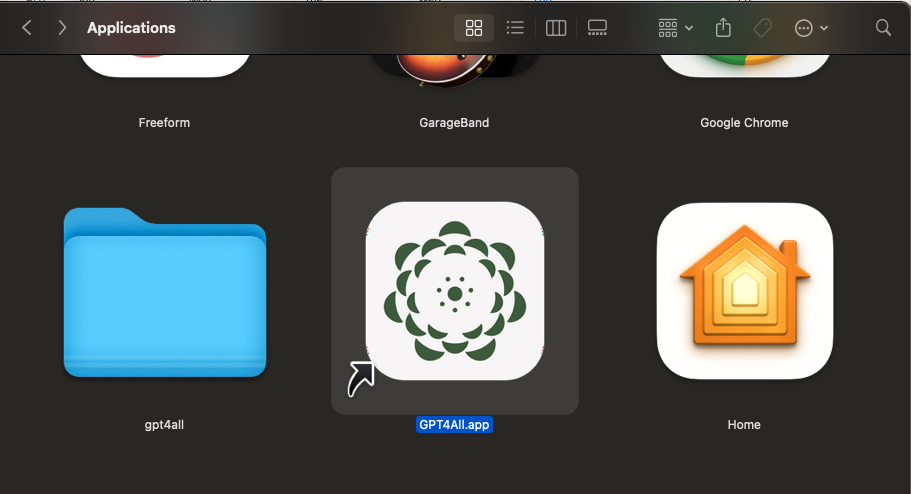
Once installed, you can navigate to where you have stored the application and open it. I have chosen to keep the default and stored the application in my Application folder.
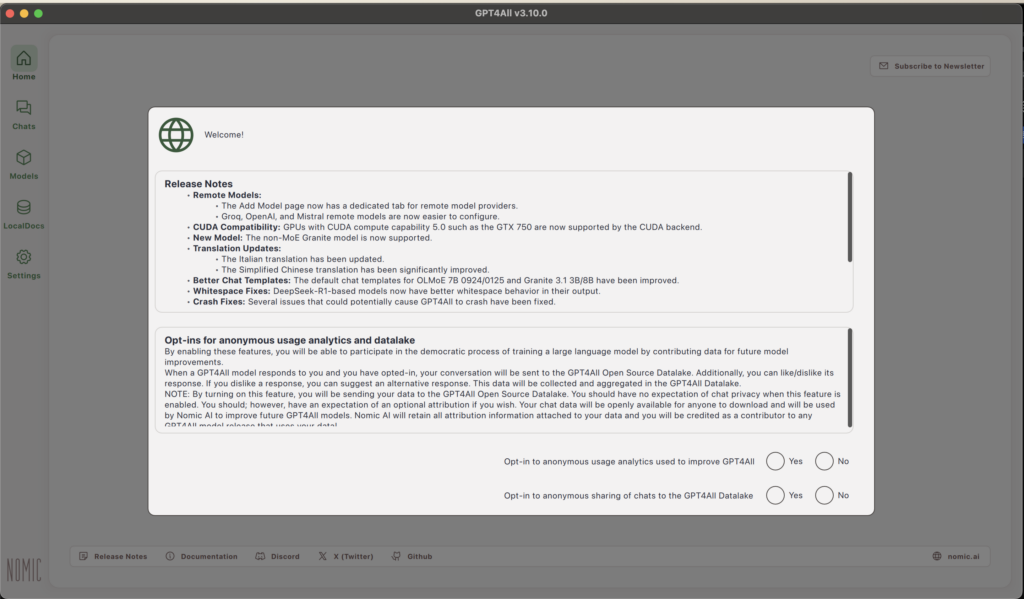
Once you open the app, it will give you the welcome pop-up, detailing the latest release notes and allowing you to opt-in to share anonymous usage analytics or sharing of chats.
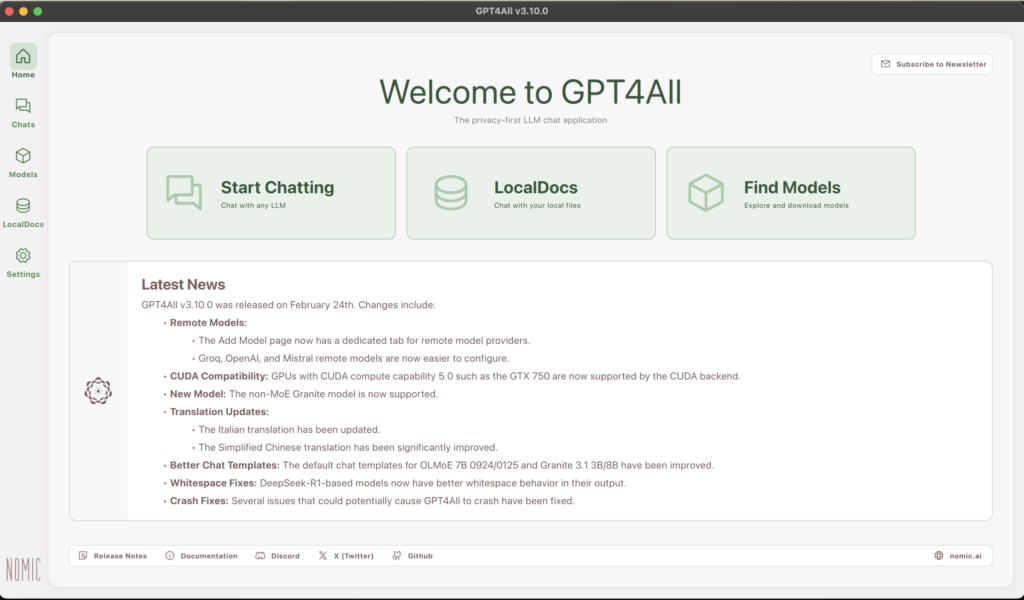
After making your choices, you are taken to the homepage.
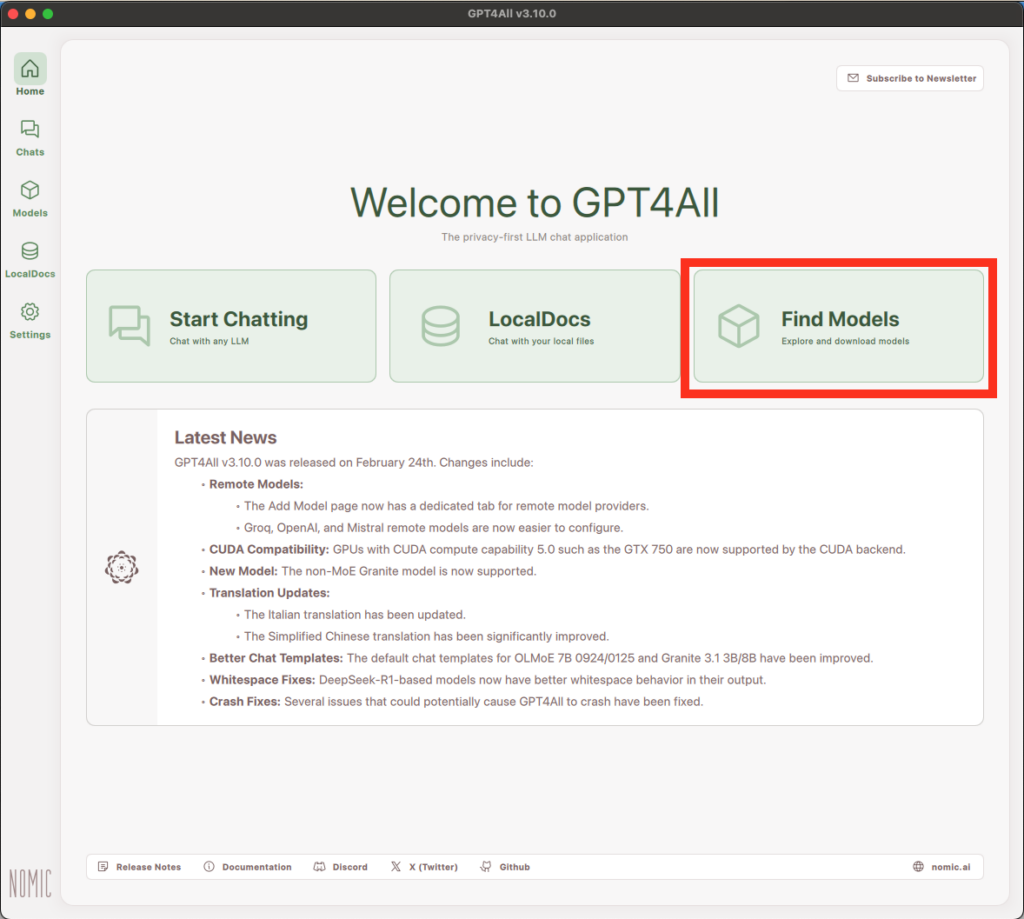
2. Download your first model
Before we start chatting, we first need to download a model to chat with. You can do this by clicking the “Find Models” button on the homepage. This will take you to the “Explore Models” page.
The simplest way is to choose a model from the list of those specifically configured for use in GPT4ALL. However, you can also use models from Remote Providers or from HuggingFace, though both these options are potentially more complicated and may require additional configuration.
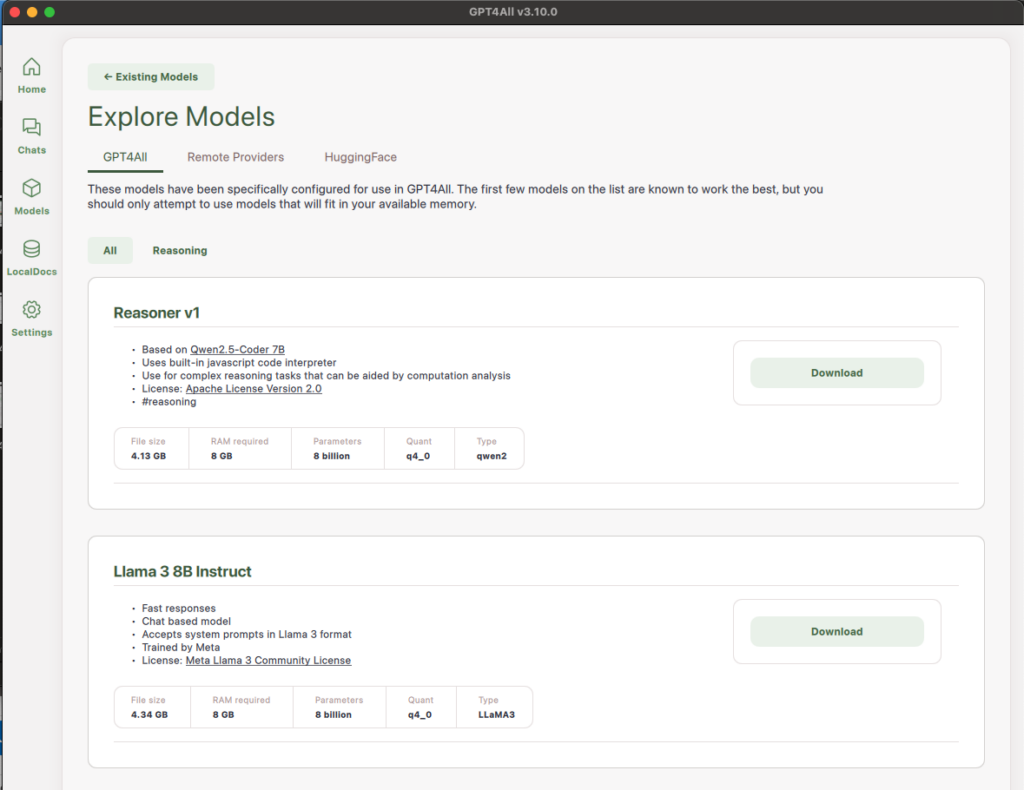
When picking a model from the GPT4ALL repository, you can see the name of the model, some information about it, and some specifications like the file size, RAM requirements, and number of parameters.
Nomic AI advises to start with Llama 3 8B Instruct as it is a smaller model (8 billion parameters) which means it has a smaller file size and lower RAM requirements. For a basic guide on hardware requirements for local AI, you can read the LinkedIn article The Ultimate Guide to Hosting Your Own Local Large Language Model (LLM) with Ollama and LM Studio.
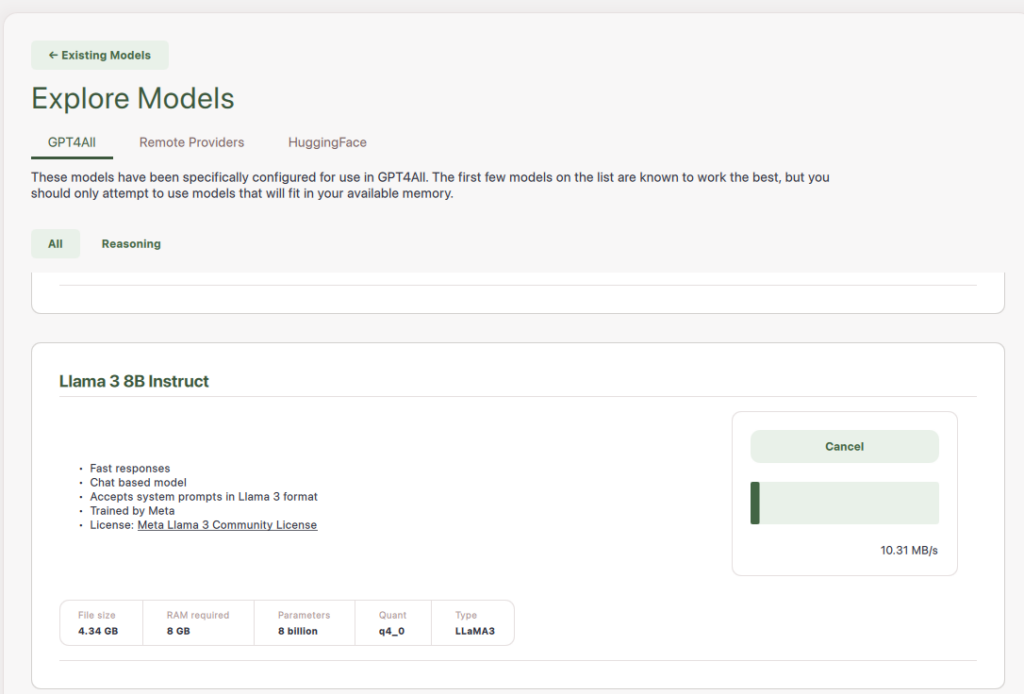
Once you’ve selected a model, click the “Download” button of that model and it will start downloading.
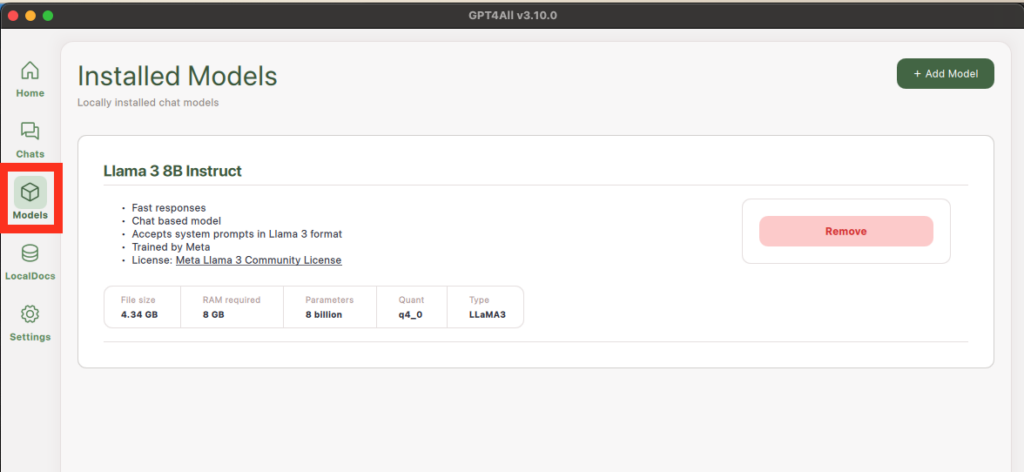
You can view your Installed Models by clicking the “Models” button on the left sidebar.
3. Start chatting
Now that you’ve installed a model, you can start chatting with it!
First, click on the “Chats” button on the left sidebar and it will open to a new chat. Second, you have to Choose a model to chat with, either by clicking “Choose a model” at the top of the page and selecting a model or by clicking “Load (default)”. Loading a model will take a few seconds.
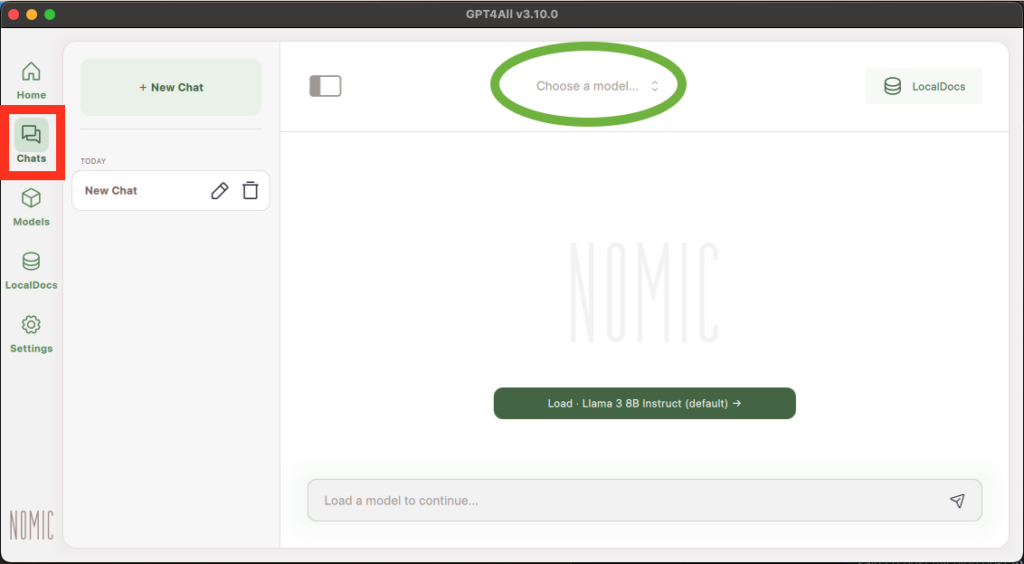
Now that your model is loaded, you can begin chatting with it.
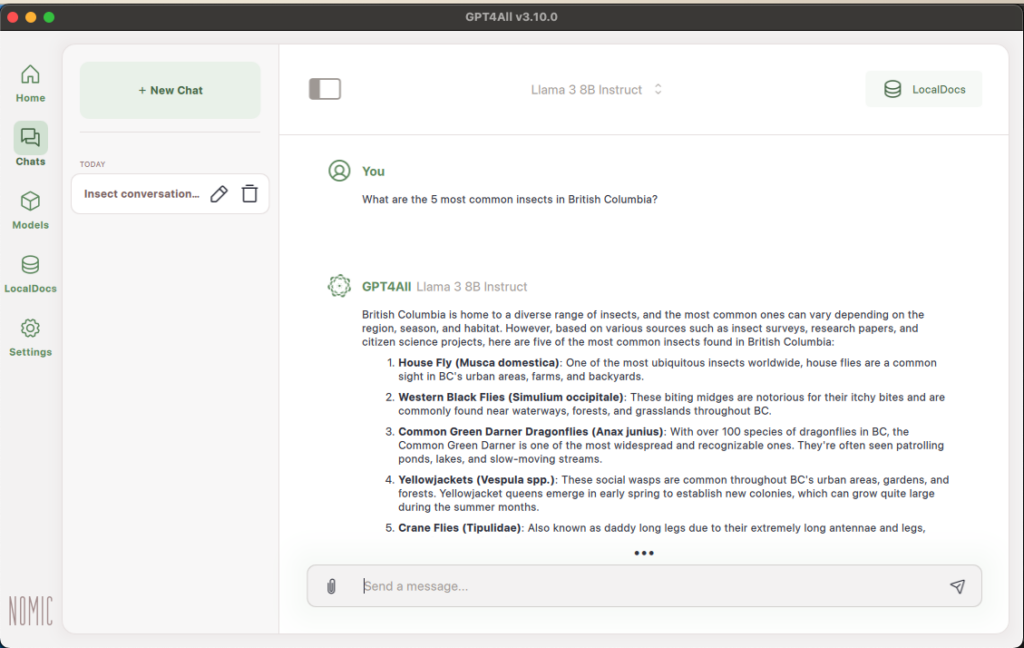
3a. Using LocalDocs
A great feature of GPT4ALL is its ability to interact with documents that you upload. As mentioned before, one advantage of running AI locally is that there are fewer risks to your privacy and this extends to the documents.
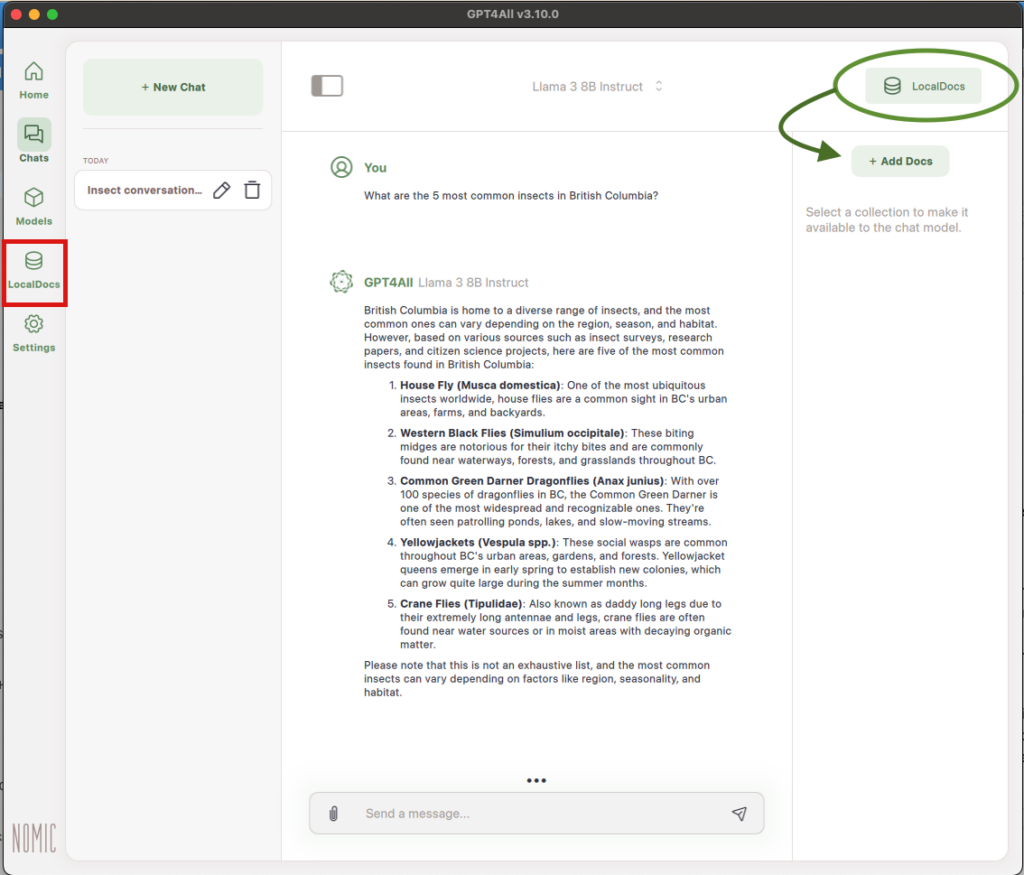
To add documents to LocalDocs, either click the “LocalDocs” button in the left sidebar or click the “LocalDocs” button in the top right corner of your chat and then click “+ Add Docs”.
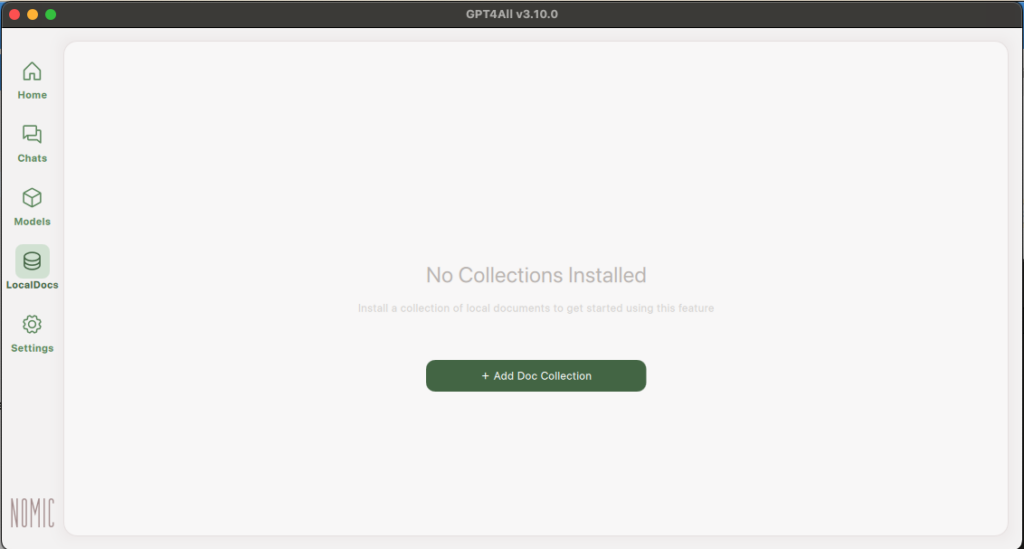
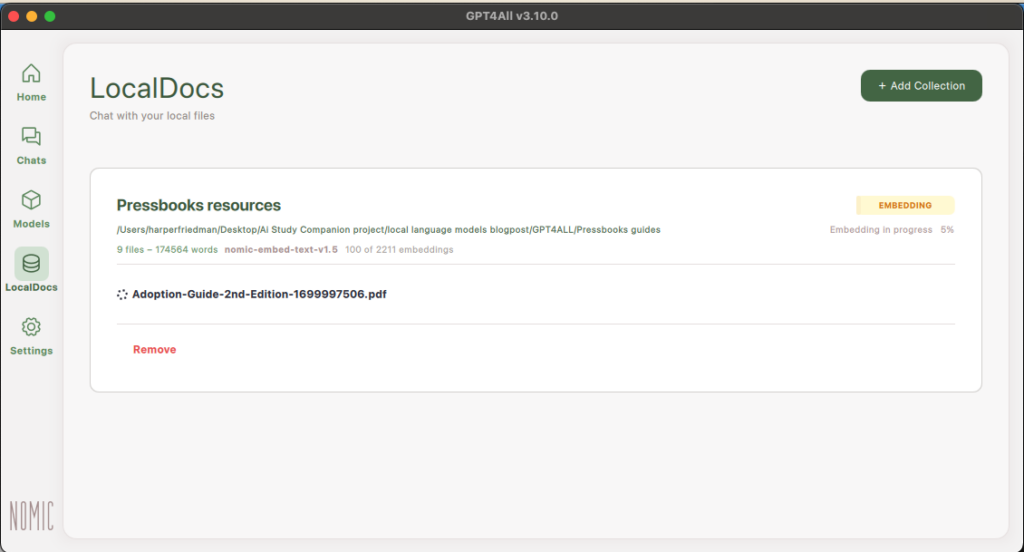
You will be taken to the Add Document Collection page. You can name the collection and then upload a folder with the documents you’d like to use by clicking “Browse” and selecting your desired folder.
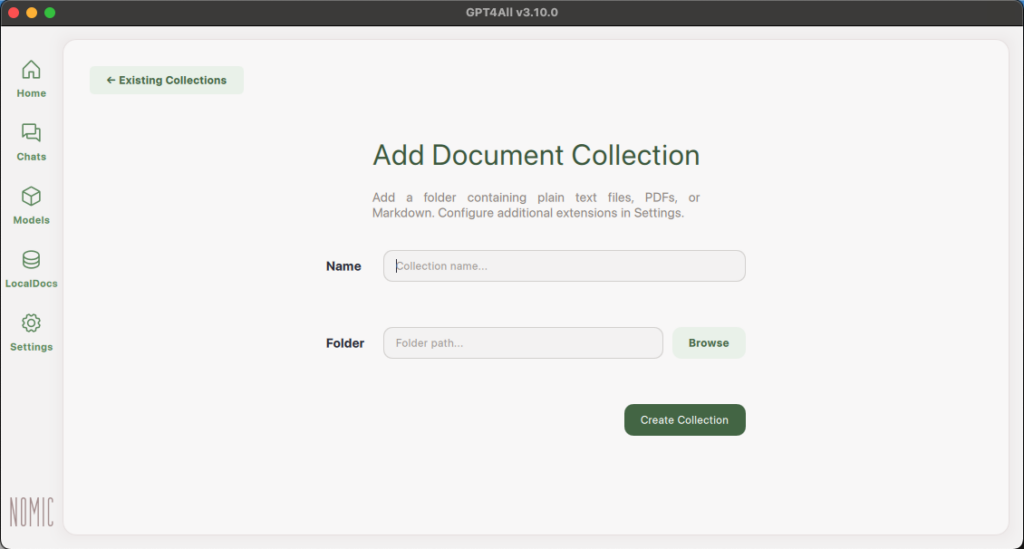

After you’ve selected your folder, click “Create Collection” and your files will start embedding.

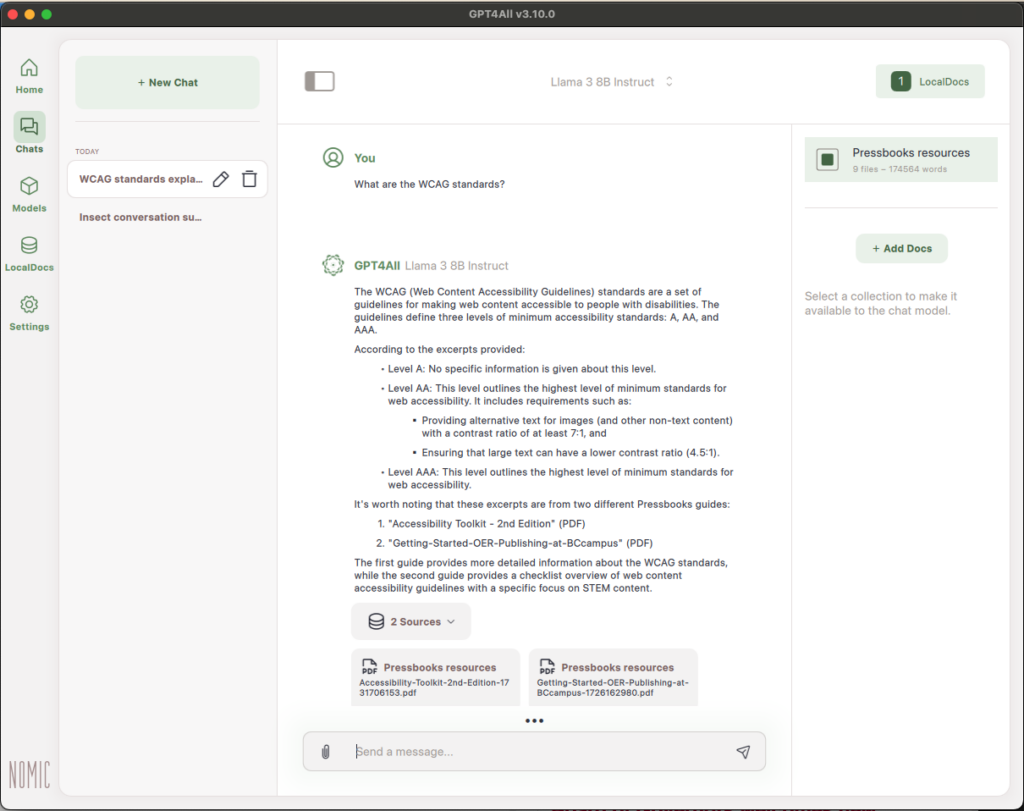
Once embedded, you can go back to your Chats, click “LocalDocs” in the top right corner, and then select the Document Collection you’d like to use in this chat. We only have one Document Collection but you can use multiple in one chat.
Then, you can ask questions about the content in the documents, ask for summaries, and much more. By default, the model will cite the sources it retrieved information from.
Howdy Harper! Your Project Champian share your project blog which I appreciate BCcampus supporting as its a practice rarely done any more. Your documentation here is supremely clear and detailed, and is incentive enough for me to give this a try.
I will be curious to hear how one goes about selecting or trying various models. I’m sure you can run a few test cases, but how do you go about knowing from that how much you can rely on the model going forward?
Hi Alan! Nice to hear from you and I’m glad that you found my blog post helpful.
Model evaluation is a complex topic and could be several blog posts by itself! It’s hard to know what methods of evaluation are best without knowing the tasks you want the model to perform. Evaluating a model’s ability to integrate into your coding workflow is very different from evaluating its creative writing ability. Plus, if the tasks you want it to perform are more trivial, then it isn’t as important to do robust testing versus if you’re using it to handle something more complex or with higher stakes.
I assume that you’re most interested in testing via prompts so I have a little bit of guidance for that.
1. Determine what task(s) you are trying to achieve: To determine what tools you need, you first need an end-goal in mind. And, like tools, different models specialize in different tasks.
2. Do a search online to see what model people recommend for that specific task: By running AI locally, you will likely need to use smaller models, as you are constrained by your hardware. Smaller models tend to be fine-tuned for more specific tasks so finding a model that specializes in your task is more important than using a larger model. For example, DeepSeek-R1 is optimized for complex reasoning and problem-solving tasks.
3. Use test prompts to evaluate different aspects of the model: This will depend on what you’re using it for and what aspects are important to you. The article “How to Evaluate AI/LLM Models with Test Prompts in 2025” has some example test prompts for maximum test length, response speed, censorship limits, and more. Additionally, there are some reddit threads on the subreddit r/LocalLLaMA that list the prompts that they use to evaluate models.
4. Test the models on real use cases: The best way to determine if the model will work for you is to push it in the deep end and test it on your use cases. If you want the model to rewrite your emails or come up with poetry ideas, then ask them to do that task and see if you like the output. You may also want to learn more about prompt engineering to get the most out of the model since prompts can make a huge difference on the output of the model. The Prompt Engineering Guide from DAIR.AI is a big, comprehensive guide about prompt engineering. Additionally, I found Rich Tape’s session on “Prompt Engineering in 2025 and beyond” to be helpful on the topic.
If you’re more tech-savvy and have more complex requirements from your models, then HuggingFace’s Evaluate library might be helpful to do specific, in-depth tests. Additionally, these two articles “Evaluating Generative AI: A Comprehensive Guide with Metrics, Methods & Visual Examples” and “Evaluating Large Language Model (LLM) systems: Metrics, challenges, and best practices” are great guides for evaluating Generative AI models in greater depth.
I hope some of this is helpful but feel free to clarify on what you’re looking for!
Useful tutorial on using GPT4all for offline generative AI—clear steps for users seeking privacy or no-internet access, making advanced AI accessible anywhere.